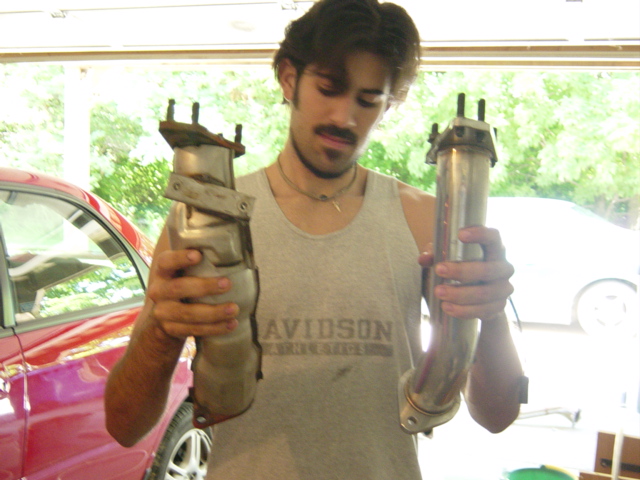
The first mod installed on the Project WRX was a complete 3" stainless steel Invidia turbo back exhaust and Invidia stainless up pipe. The install of this package is a simple "bolt-on" affair that can add as much as 30+ horsepower.
Up Pipe Installation
We began with the installation of the up pipe wich involved removing the secondary exhaust manifold from the bottom of the car. To do this, several undercovers and heat shields had to be removed from the bottom of the car along with the primary oxygen sensor. On top of the engine bay, the intercooler and intake piping had to come out as well as the turbo heat sheild.


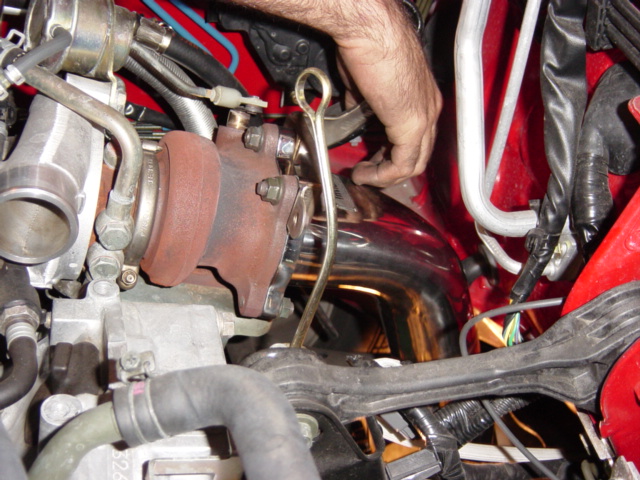
Once everything was removed the up pipe could be unbolted from the turbo and wiggled out the bottom of the car after raising the engine up a couple inches in the bay for clearance. A quick word of warning for anyone attempting this install at home, don't unbolt BOTH of the lower engine mounts only one. We found out the hard way when we lifted the engine off the chassis and it didn't want to come back down right. Add a quick hour to the overall install time if you make this mistake.
We had to take the Invidia up pipe to Street Sports to have an EGT bung welded on it for the factory sensor as the up pipe did not come with one. The new up pipe went back in the same way the old one came out and was bolted back to the turbo. At this point, the lower exhaust manifold could be bolted back on and the bottom of the engine could be put back together.
Turbo Back Installation

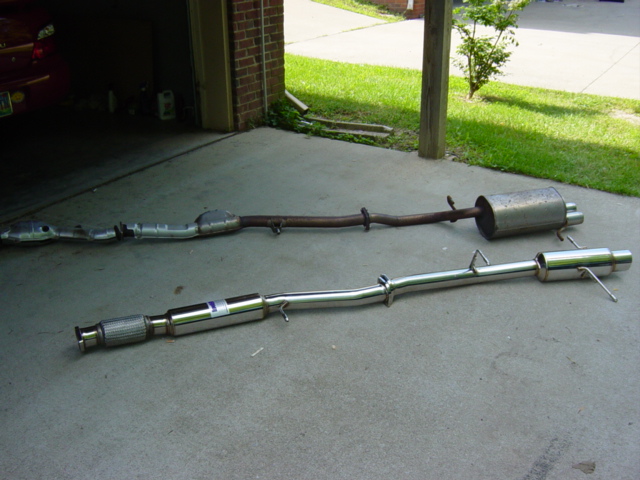
With everything still in pieces on the top side of the engine from putting in the up pipe, the downpipe could be unbolted from the turbo with a little finaggaling. Another quick tip, after unsuccessfully trying to remove the downpipe after just unbolting it from the turbo we discovered there were several other hidden bolts still holding it on. There is one holding it to the tranny and two small ones holding it to the main up pipe bracket. Could have saved ourselves 20 minutes of delicate tugging had we known this to begin with. With the downpipe completely loose, taking the whole exhaust sytem off the bottom of the car was very easy. The secondary O2 sensor needs to be unplugged before the catalytic converter can come out, but other than that, unbolt a few bolts and take off some rubber hangers and be ready for 50 pounds of stock exhaust to fall to the ground.
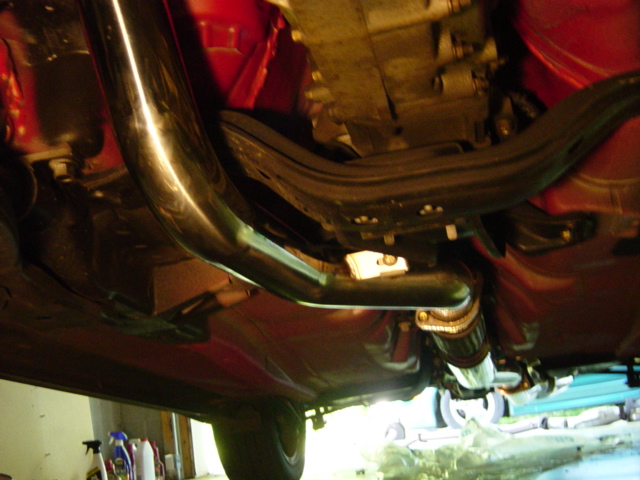
Again, the Invidia system went on the exact opposite the stock system came off and within 15 minutes of dropping the factory equipment, we were staring at our reflections in a nice shiny stainless muffler.


Putting the rest of the engine (Intercooler, ect) back together was fairly straightforward. However, after installing this exhaust be prepared for your lower turbo heat shield to not fit at all and the upper one not to fit without some serious work with a cut off wheel.
All in all the total install took around 8-9 hours spread over two days. We ended up spending a lot of time fighting a siezed exhaust bolt and of course trying to get the engine to fit back in the car. However, there were no real snags and putting this system on your car can be done by anyone with some determination and a set of wrenches.
Impressions
After firing up the car for the first time our initial reaction was, "Dear God we turned the scooby into a Harley!" No joke the idle on this thing is incredible, definitely a plus. You can hear the turbo spooling much more clearly and boost response is increased as well. The butt dyno tells us that hp is significantly up, but it might just be the jet engine roar of the new system getting our adrenaline pumping. Might we add, no silencer being used on this car! All in all we were very pleased with the results of this install and look forward to our next chance to work on the boxer.
 AF Project Vehicle | Corporate