The Honda Camber Kit Guide
After a few year experience and testing I can now give a fairly good guide on Honda camber kits.
Choosing a kit should be decided based on the tuner current setup.
1.How is your suspension setup
2.How low are you
3.What wheel tire size do you have and offset
4.What is your goal (race or pimp it)
5.How much do you want to spend
With those things in mind, take a peek at the following
Front Camber kits
If you are lower than 3.0 inches, have 17"+ rims, or 40mm offset or lower or all of them, the tuner will need to be careful that an alignment kit will not cause rubbing.
The best kit would be those situations would be the Skunk2 Front camber kit.
King Motorsports sells these kits re-badged as their own they are identical.
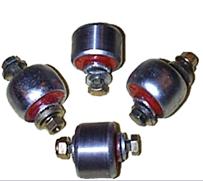
The benefits are that these kits are the best for excessive lowering and for those who have improper offset rims and or wide tires. The people are for the most part guaranteed not to bang against the upper part of the shock tower with the Skunk2 kit. The other kits that tend to use eccentric bushings like these pictured move the A-Arm out farther which causes banging in some applications

If you are using 16" rims or lower with an inch less than 2.5" and rims with the proper offset, and are considering racing try
Kmac adjustable ball joint kits.

These are sliding ball joint camber plates that mount and replace the factory ball joint on the upper control arm.
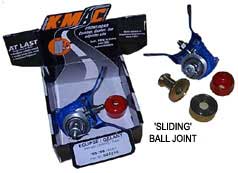
This kit is good for the racer because you do not have to raise the car for adjustments which takes 70% less time to align so if you have the proper tools to align your car, and or do it frequently. The kmac has a top nut that loosens to pull the camber plate forward or back with an adjustment screw for easy fine adjustments, while the car is under load.
The Progress and SPC ball joint kits use a similar idea however they do not use plates they just replace the factory ball joint and adjustment more difficult.
The drawbacks:
Longer install times, stock control arms and bushings (which can be upgraded) and smaller range of adjustment + or - 1-2 degrees.
For an average drop of 1.5" or less and stock rims or 15-16" wheels with proper offset
Ingalls
Progress Suspension
These are very good kits; however it is an old design. For those conditions mentioned this is the best kit. These kits use cam bolts to move the a-arm pictured just above, in and out to adjust camber which is great for minor lowering and very effective. The ingalls has a better range of adjustment however the progress uses some nice poly bushings, but can cause the following issues.
Drawbacks
1.Excessive lowering will rub the a-arm using extreme camber correction
2.Does not have a large adjustment range
3.Average alignment time. (easy to adjust)
REAR CAMBER KITS
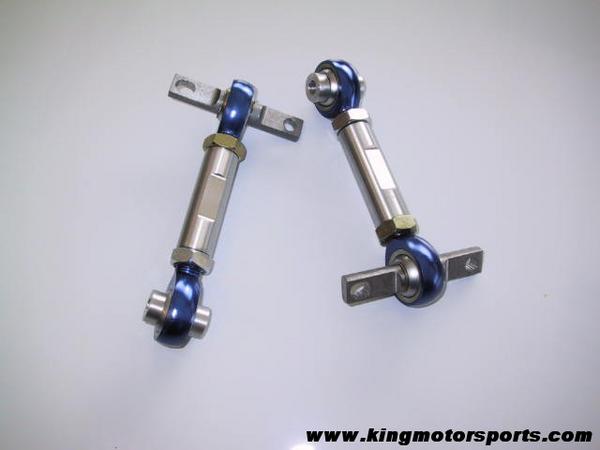
For the rear kit the best kit for a Honda is the King Motorsports branded rear upper control arm kit.
The only thing I complain about is no, grease fitting for those who drive in winter, where the joints will get packed with filth.
The second choice third choice would be the
2nd Ingalls and 3rd SPC adjustable rear upper control arm.
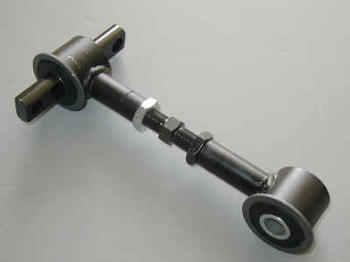
Advantages: this is the best most cost effective kit you can buy, the quality is proven and so is the adjustment range is extensive.
There is conversation as to where it is most effective to adjust camber on Hondas; the most popular for the rear is the upper control arms, which moves the top of the top in and out.
There are bushing kits like the Kmac that adjust camber using the Lower control arms to move the wheel in and out slightly lower than center which is more effective at keeping the camber curve more constant under load.
But, these kits replace the lower control arm bushings and bolts with eccentric bushings which means you can say goodbye to most sway bar mounts along with tire bars. It also can be difficult because adjustments on these bushings affect toe angles, so it may be easy to adjust at the track, you are effectively changing toe angles as well.
With that in mind and the drawbacks of those bushings the best way to go is Ingalls or King upper control arm kits for the rear.
If you are totally cheap Ingalls offers these replacement lower control arm bolts and washers (or shims).
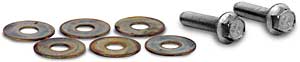
It is 10$ to buy and the cheapest way to fix rear camber, but totally annoying to align since you are adding washers, there is no science to it and it takes longer.
But if you are doing this trick, buy these bolts!!! Don’t buy some soft metal bolts from Home Depot that will rust or break.
This should help sort out the types of kits and what brands to look at. There may be other brands out there that do the same thing as most of these listed, I just highlighted some of the more quality pieces out there. If the tuner goes outside the major parts manufacturers make sure that there is a good warranty on the part.
M. Sanew - Dezoris
 AF Project Vehicle | Corporate
